To configure a domain to use Google Workspace with cPanel, follow these steps:
-
Sign up for a Google Workspace account:
- Visit Google Workspace and click "Get started" to create a new account.
- Make sure to specify the correct domain for your hosting account.
- Complete the account setup by following the instructions in the email you receive.
-
Verify your domain:
- Access the Google Workspace admin console using the link provided in the email.
- Follow the domain verification process outlined in Google's official documentation.
-
Configure DNS settings in cPanel:
- Log in to cPanel by following the guide in Accessing cPanel..
- Open the Zone Editor tool:

- Locate your domain and click "Manage".
- Delete any existing MX records.
- Click "Add MX Record" and enter your domain name, TTL, priority, and destination. Example:
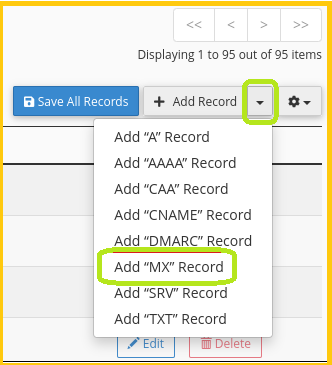
- Save the record.
- If you signed up for Google Workspace after April 2023, repeat steps 5 to 10 with different priority and destination values.
- Delete any existing TXT records starting with v=spf.
- Click "Add TXT Record" and enter your domain name and the SPF TXT record:
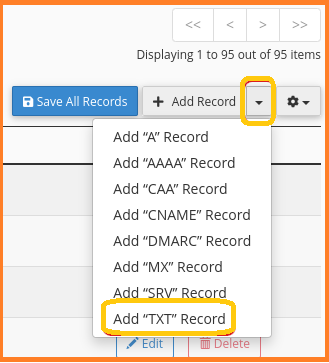
- Save the record.
-
Configure Email Routing:
- Open the Email Routing tool in cPanel:

- Select the domain you want to configure.
- Choose "Remote Mail Exchanger" under "Configure Email Routing".
- Click "Change" to update the e-mail routing settings.
- Open the Email Routing tool in cPanel:
To remove a domain from Google Workspace, delete the DNS records created in the previous steps and restore the previous MX records and SPF TXT record. Reset Email Routing in cPanel back to "Local Mail Exchanger" to manage your domain's e-mail accounts through cPanel.
Remember that DNS changes may take up to 24 hours to propagate fully.
